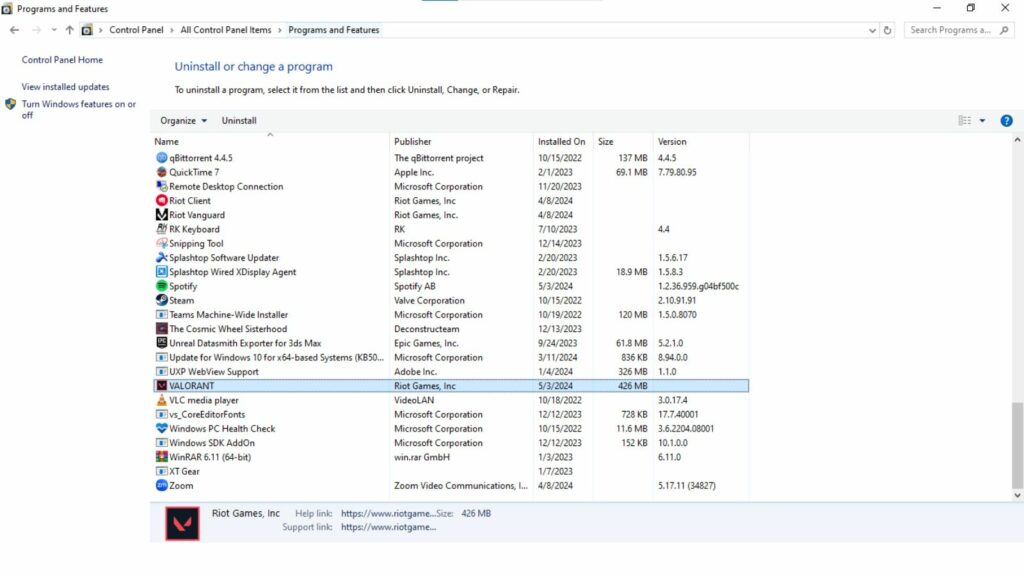
While Valorant is a fun game to play on your own or with friends, it does take a lot of storage on your device.
If you’re curious about how to uninstall Valorant, we’ve got you covered.
Upon deciding to uninstall Valorant, it’s important to be sure of your decision. You could just be frustrated in a particular rank that discourages you from playing, but if you genuinely enjoy the game, consider otherwise.
With that in mind, we’ll guide you through how to uninstall Valorant step-by-step. This will help you take some time off from the game and also save you some disk space.
Here is how to uninstall Valorant

To uninstall Valorant, you must know that the process is a bit different from simply uninstalling it from your device’s Control Panel.
The game comes with the Vanguard anti-cheating software that prevents the complete removal of the game.
You must first uninstall the Vanguard before uninstalling Valorant altogether. Once you do that, you’ll be able to completely remove the game from your laptop or PC.
Step-by-step guide

- Open the system tray found at the bottom-right corner of your device.
- Right-click the red Vanguard icon.
- Click “Exit Vanguard.”
- Use the Windows Search Bar and type “Control Panel.”
- Click the “Programs” tab and then navigate the list to find “VALORANT.”
- Click “Uninstall” beside the “Organize” button or right-click the selected application and click “Uninstall.”
If you’ve followed the steps above, you’ll be able to disable the Vanguard software and complete this guide on how to uninstall Valorant.

Your account also won’t be affected by uninstalling the game so you can log back in with the same credentials you used when you last played Valorant.
Do take note that you can reinstall the game anytime by heading to the Valorant website and downloading the game installer.
READ MORE: Valorant’s Mystbloom skins are giving players a super unfair game-breaking advantage


